|
|
|
| Updated October
3, 2004
|
Use the blue menu here below to navigate.
Sefy's Complete DVD Backup Guide v2.6
| Using - MainConcept MPEG Encoder |
|
|
This encoder from MainConcept is as fast as TMPGEnc atleast,
and it's quality is equal or better, that would be for you to decide, although
it can open VOB files directly, it can only open one at a time, and since
it can't open D2V files, you will also need the VFAPI converter and VirtualDub to
make it accept the entire VOB's set of a movie, i've also had some
problems making it read the WAV file that was generated from the Movie,
so
if you are having problems, I suggest you set VirtualDub
to frameserve both Video and Audio, this works great and doesn't reduce the
speed of the encoder. If your source is an AVI file, you can try using it
as both the Video and Audio sources.
|
|
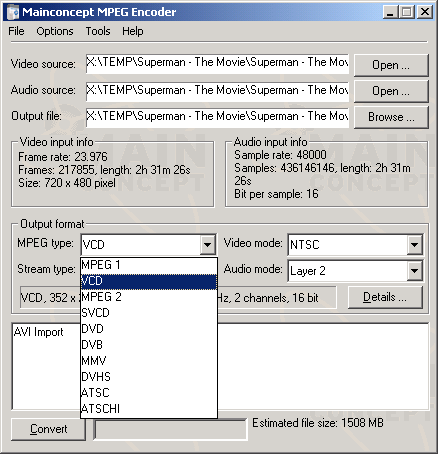
Step
1 - Select your "Video source" and "Audio source" by clicking on "Open",
if you want your "Output file" to be in a different location then the default, then click on "Browse", when you are done, select the "MPEG type" you are creating.
 |
|
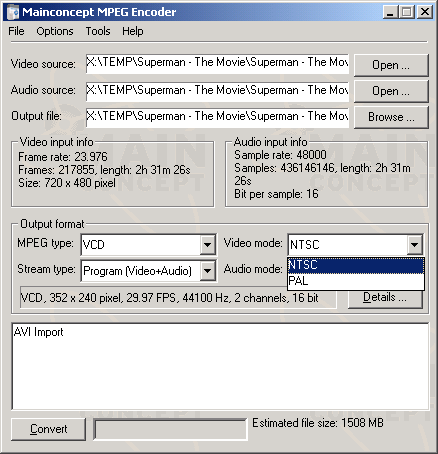
Step 2 - Under "Video mode" select if you are creating a PAL or NTSC movie, use the "Video input info" to determine your type of movie.
 |
|
|
Step 3 (a/b/c) - Click on "Details" and here you can customize your movie's Video and Audio
sections, everything is selected automaticly, but you can of course make
changes if you know what you are doing.
You can also by using the "Enable file splitting"
option, select at which size you want the encoder to split the file, incase
your movie is longer then one CD as in Picture 3b. If your movie is Wide Screen, click on the "Crop & Scale" button and set your movie "Height" (195 should give you a good Wide Screen) as in Picture 3c.
NOTE:
If you want to author the resulting file
into a DVD Media, then I suggest you change the Audio Frequency to
48000
Hz instead of 44100 Hz, as DVD specs require it. However, MainConcept
will not allow you to use a Specific Format and create a Non-Standard
file, so if you want to create one, use the MPEG1 (or MPEG2) option
instead.
a) 
b) 
c) 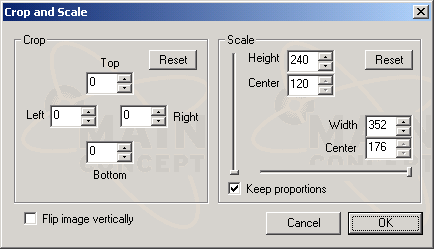
|
|
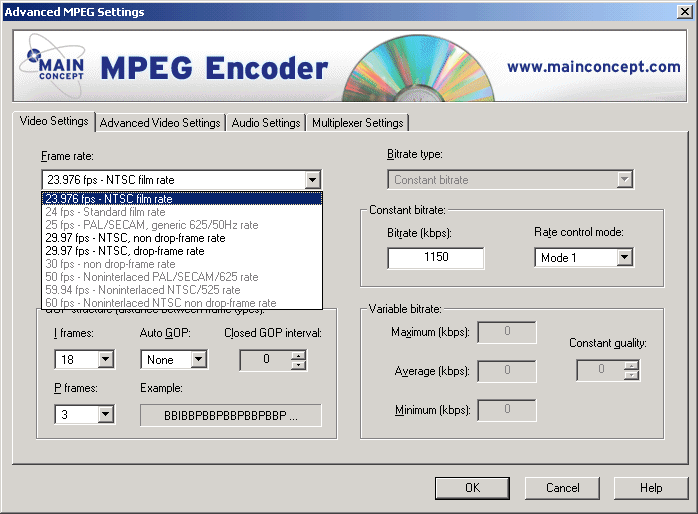
Step 4a - Click on the "Advanced"
button, and use the following screens to optimize your Video and Audio Quality
to the max, you do NOT have to make any changes, and don't do unless you
know what you are doing, there are four screens here to set up, in the "Video Settings" you can select the type of "Frame Rate" and the amount of the I and P frames
 |
|
Step 4b - Click on the "Advanced Video Settings" to enable the "Motion search pixel movement" and you can tweak some more quality by using the "Additional settings" on the right.

|
|
Step 4c - Clicking on the "Audio Settings" will let you select how you want the Audio to be encoded, you can also set the "Audio type" and the "Mode" of the encoding (Stereo/Joint/Dual) and you can also Set Private/Copyright/Original and Enable CRC.

|
|
Step 4d - Click on "Multiplexer Settings" to choose the "Multiplexing type" from the pull down list, or if you want to select at what point to split the file encoding, you can set the size under "Split file options", when you are done, click on the "OK" button.

|
|
Step 5 - Click on the "Convert" button to start the encoding process.

|
|
|
Next - Splitting large MPEG files
to fit CDR media! or Authoring [Burn! Baby
Burn!]
|
|
|
|