| Using - EasyDivX - Direct from DVD |
|
|
EasyDivX is an
all-in-one capable. Meaning, it will do the copying, encoding and
subtitles of your movie from start to finish. It's does not require
other programs, except a DivX Encoding software. It's Freeware and very
easy to use.
|
|
Step 1 - DVD Movie Copying!
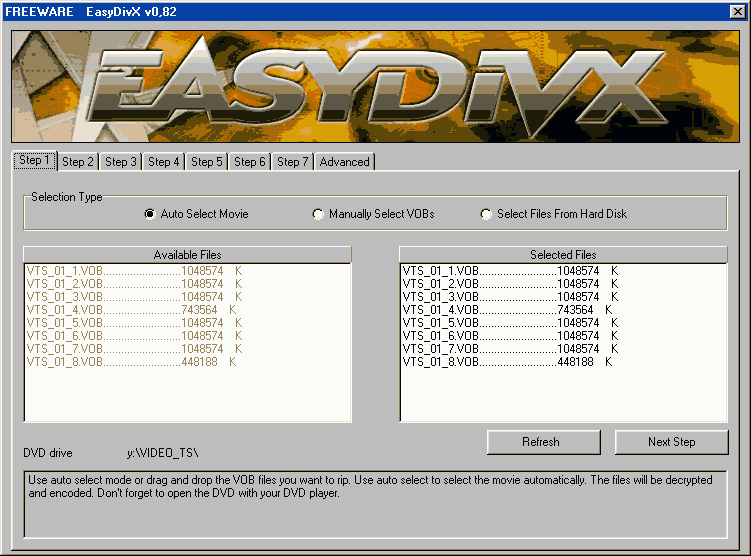
Load your DVD Movie in the DVD drive and use the "Auto Select Movie" option, this will automaticly select your movie VOB files, if you want to encode a different segment of your DVD, select the "Manually Select VOBs" option instead. When done click on "Next"
 |
|
Step 2 - Movie Length and Audio Quality!
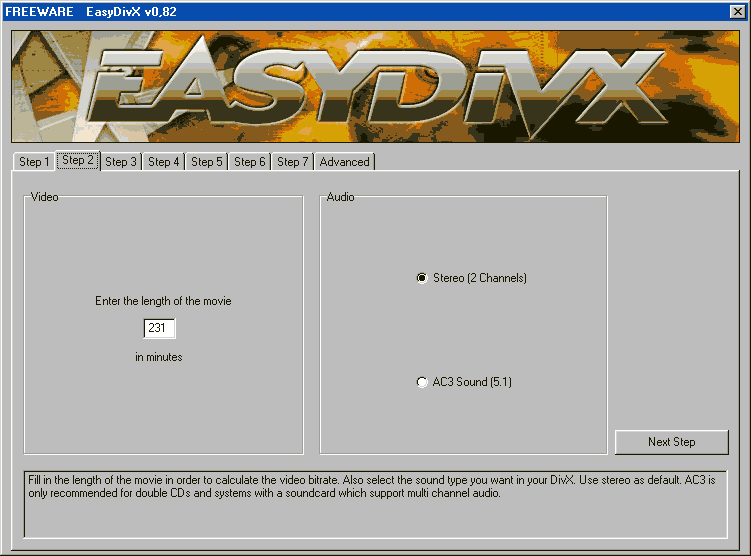
Here you select the length of your Movie, so the encoder will know how to set up the correct quality for it. Also use the "Audio" to choose if you are going to create a regular "Stereo (2 Channels)" or a "AC3 Sound (5.1)" encoded movie. Click on "Next" to continue.
 |
|
Step 3 - Movie Language (or Languages!)
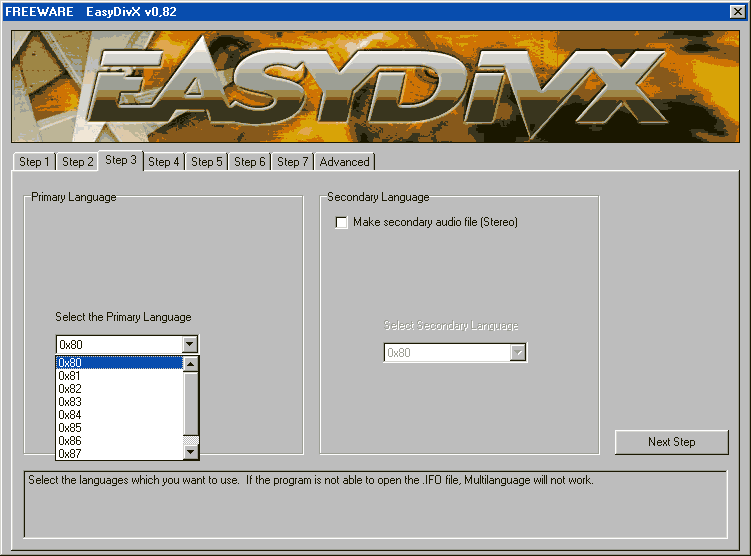
On this step you select which language to be used in your movie, or if you want you can enable the "Make secondary audio file (stereo)" for a second language option. Click on "Next" to continue.
 |
|
Step 4 - Movie Size and Aspect!
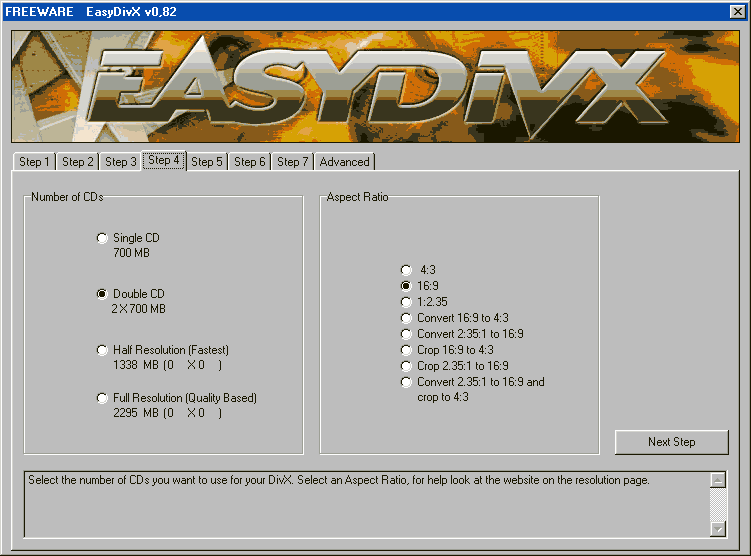
Under the "Number of CDs"
select how many CD's should be used for the movie, the longer the
movie, the more CD's are recommanded to maintain high quality, Since
this movie is over 2 hours long, i've used the "Double CD" option. Because of the selection i've made, i've now got the option to select the "Aspect Ratio" of the movie, in this case it's a "16:9" resolution, choose according to your movie.
 |
|
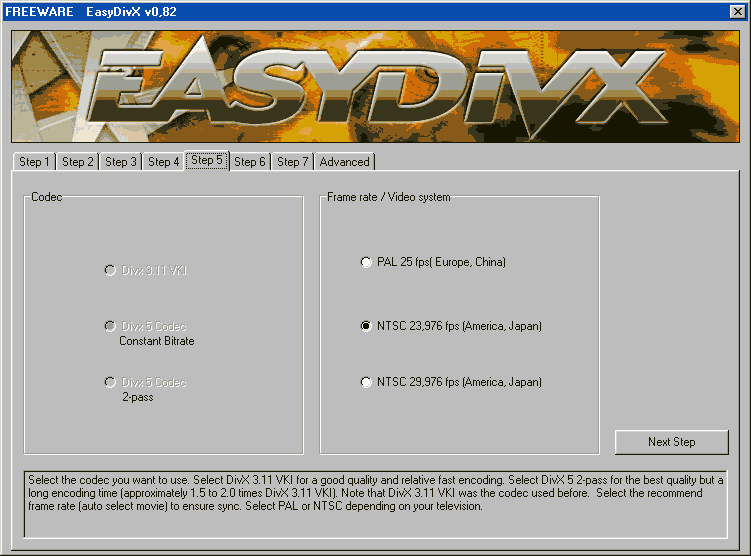
Step 5 - Encoding and Framerate!
Under the "Codecs"
select which codec you want to be used in the encoding, this will be
selectable depending on the Codecs you have installed in your PC. Then
select the framerate of your movie from PAL to NTSC and Film, choose
according to your Original Movie!
 |
|
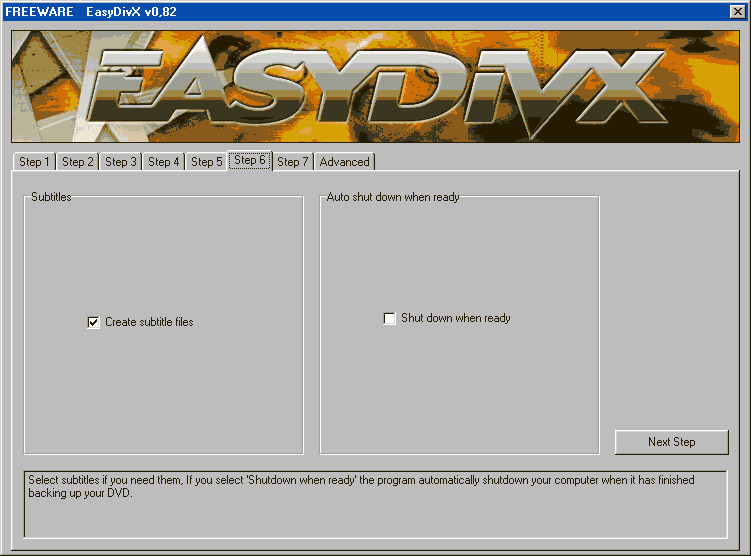
Step 6 - Subtitles!
If you selected in "Step 1" to use the Original DVD, the Subtitles option will be available, if you want to "Create subtitles files"
make sure you mark this option, it will NOT integrate it into the
movie, those will be selectable subtitles!. You can also choose to "Shut down when ready" if you don't want the PC to stay on when the encoding is done.
 |
|
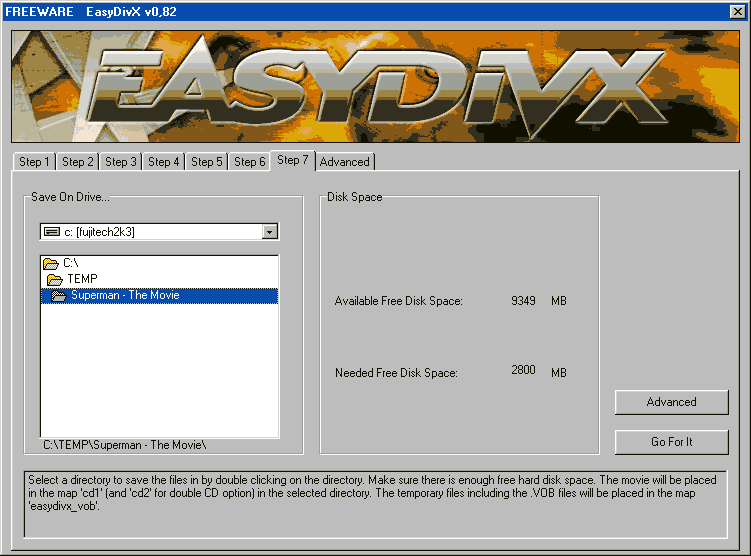
Step 7 - Choose your Destiny!
Make sure you have enough "Available Free Disk Space"
for all the required files, and also that the folder you are saving to
does not have any space or weird charcters, or the program will fail
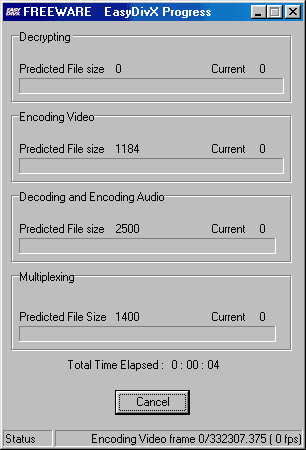
the encoding (It will report before it starts!). Click on "Go For It!" to start encoding!
 |
|
|
| THE END |