| Using - DVD2SVCD - Direct from DVD |
|
| DVD2SVCD is an
all-in-one capable. Meaning, it will do the ripping, frameserving,
subtitles and encoding of your movie from start to finish. It's basicly
an Interface which provides easy set up for other programs |
|
|
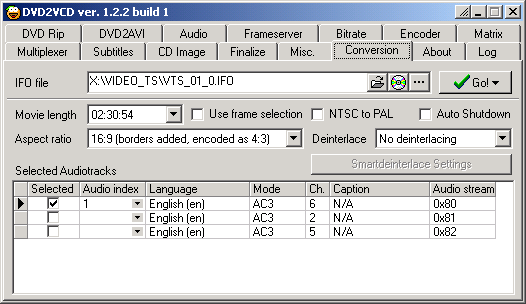
Step 1 - Conversion
After you first load DVD2SVCD, please your DVD Movie in your drive, and
click on the DVD Icon Button, this will scan your disc and automaticly
select the movie, if you wish to encode a different segment of your
movie, you can click on "Movie Length" and do the changes, if you want more accuracy, you can use the "Use frame selection" and for those who live in the US and you've recieved a PAL movie, you can use the "NTSC to PAL" to do a conversion.
 |
|
|
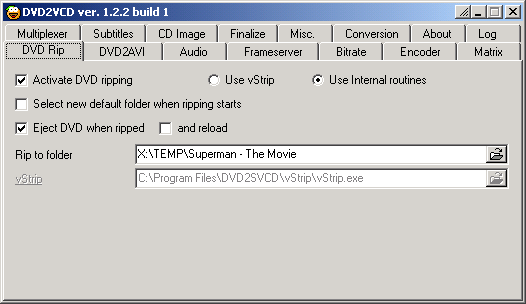
Step 2 - DVD Rip
Clicking on the "DVD Rip" tab, you can set up if you want DVD2SVCD to do the ripping itself by clicking on the "Activate DVD ripping" and then set it up to "Use Internal routines" or "Use vStrip" which is an external program, you can also set it up to "Eject DVD when ripped" so the DVD movie will be ejected after it was ripped. Here you can also select which location to rip using the "Rip to folder" option.
 |
|
|
Step 3 - DVD2AVI / Frameserver
Under the "DVD2AVI" tab you set up the location of DVD2AVI and where to "Save project in" and which "iDCT Algorithm" should be used, you can also set the "NTSC Field Operation (Force film)" for those NTSC Film movies.
 |
|
|
Step 3b - Under the "Frameserver" tab, setup the Quality of the frameserving file when using the "Avisynth setup" option
 |
|
Step 3c - Also you can set how the end resolution will be using the "Resize to" pulldown menu.
 |
|
|
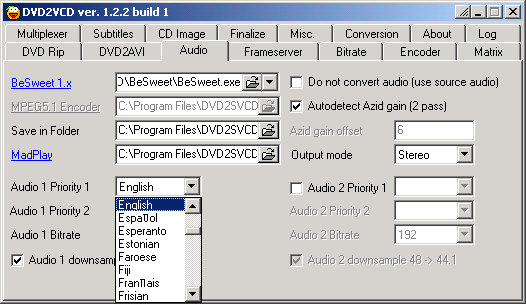
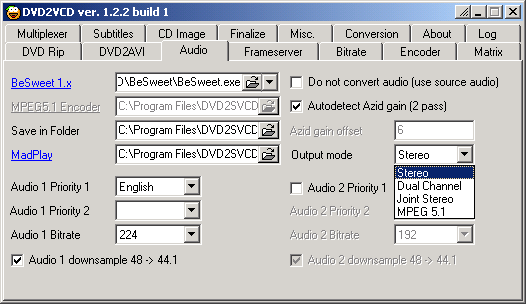
Step 4 - Audio
Under the "Audio" tab you can select the language which will be used in your movie using the "Audio 1 Priority 1" if you are creating an SVCD or DVD with Multilanguage, you can use "Audio 2 Priority 2" to enable the second language.
 |
|
|
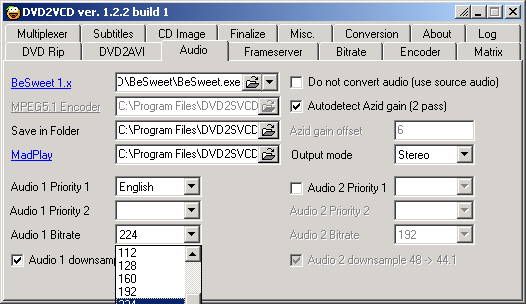
Step 4b - Use the "Audio 1 Bitrate" the set the quality level of your Audio, default for VCD/SVCD is 224kbps
 |
|
|
Step 4c - Using the "Output mode" pulldown menu, you can select your Audio Settings from Stereo to a MPEG 5.1 (SVCD or DVD only!)
 |
|
|
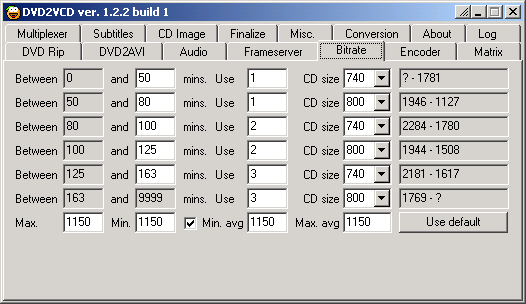
Step 5 - Bitrate
Under the "Bitrate" tab, you
select how the movie will be split to be fit into a CD size, in this
example, since the movie is 153min long, you can set it up to use 2 CD
size of 800mb
 |
|
|
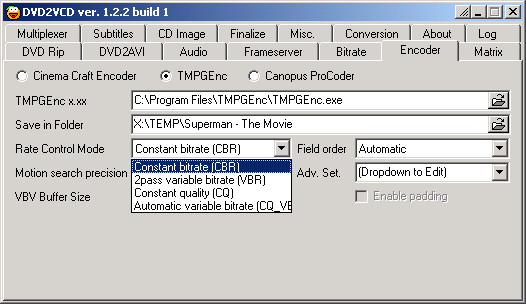
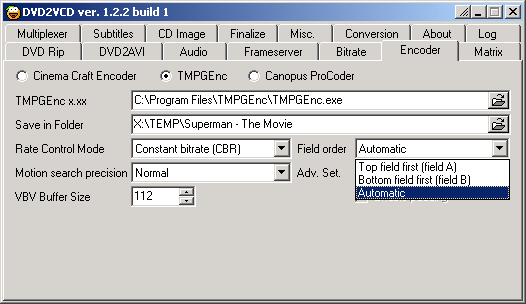
Step 6 - Encoder
Under the "Encoder"
tab you can select which Encoder to use from CCE / TMPGEnc or Canopus,
they will be loaded when needed during the process. use the "Rate Control Mode" to set the quality of the encoding.
 |
|
|
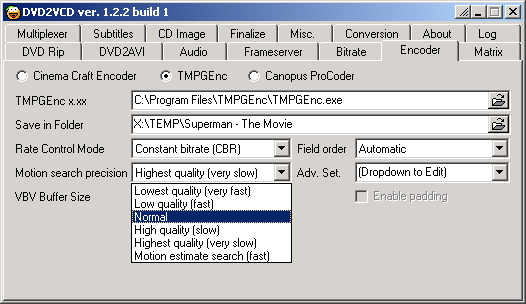
Step 6b - Also set up the "Motion search precision" for picture/movement quailty of the movie
 |
|
|
Step 6c - Use the "Field Order" to select between Automatic or Top and Bottom field.
 |
|
|
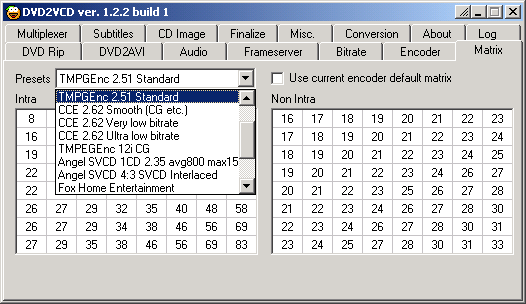
Step 6d - Under the "Matrix" tab you can use the "Presets" to define the encoding type
 |
|
|
Step 6e - Under the "bbMPEG" you set up the location and "Save in Folder" of the Final Resulting MPEG files
 |
|
|
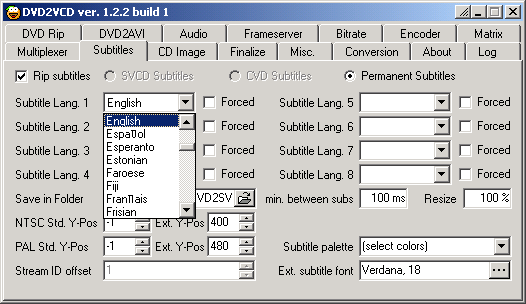
Step 7 - Subtitles
Under the "Subtitles" tab you can select which Subtitle language (or languages if multiple) will be used in the movie
 |
|
|
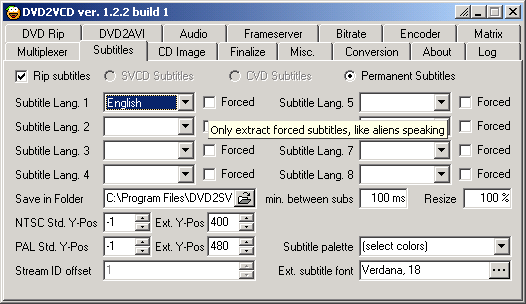
Step 7b - Click on the "Forced" option if you want to use ONLY some of the subtitles, such as Alien Language
 |
|
|
Step 7c - Clicking on the "Subtitle palette" you can choose which colors to display the text
 |
|
|
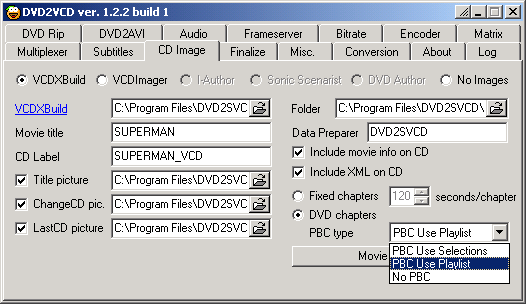
Step 8 - Chapters and Images
Under the "CD Image" tab you select the "Movie title" and "CD Label"
which will appear when you insert your Burned movie into the drive. You
can also set how you want the Chapters in the movie, either "Fixed Chapters" or "DVD Chapters" to match the Original DVD movie itself, Or you can use the "No PBC" to disable chapters completely.
 |
|
|
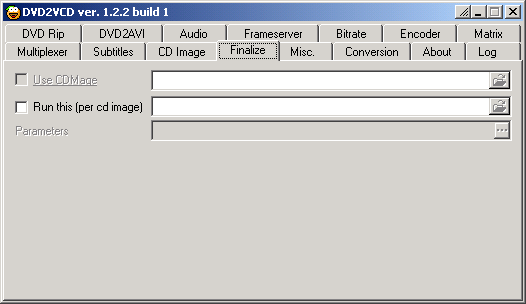
Step 9 - Finalize
Under the "Finalize" tab you
can select which Burning program will load when the images are done. Or
you can skip it and load your Burning program for Bin/Cue images later
on. Use the "Run this (per cd image)" option to select which burning program to load up.
 |
|
|
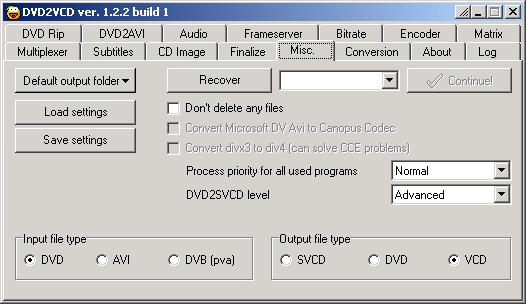
Step 9b - Under the "Misc." tab select the "Output file type" of your movie, if it's a VCD/SVCD or DVD, and also what is your "Input file type" for DVD or AVI sources.
 |
|
|
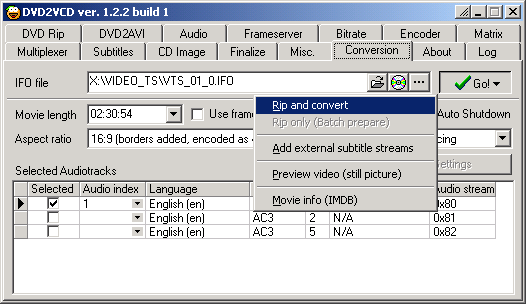
Step 9c - Back to the "Conversion" tab, click on the large "V" button and select "Rip and convert" to begin the processes.
 |
|
|
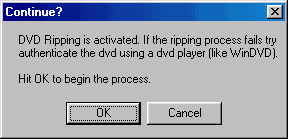
Step 9d - If you selected the "DVD Rip" option you will recieve a "Continue?"
window, make sure your DVD Movie has been played by a DVD Player (like
WinDVD or PowerDVD) so the ripping process will not fail. When you are
ready, click on the "OK" to begin.
 |
|
| Next - Authoring [Burn! Baby
Burn!] |
|